Export data in Grid Reporting
Learn how to export Grid Reporting data in the platform, from choosing an export type to downloading the finished file.
Use Grid Reporting data export to generate and download Grid screening data as CSV files.
Before you submit an export request, you can:
Choose an export type.
Select which columns to include.
Apply filters to refine the data.
Follow these steps to export Grid screening data.
From either xeu.maxsight.com or xus.maxsight.com, log in with your Grid Reporting user name and password. If you do not know which URL to use or don't have login credentials, contact your organization's administrator.
Select from the navigation menu.
Select an export type that matches the type of analysis you want to perform.
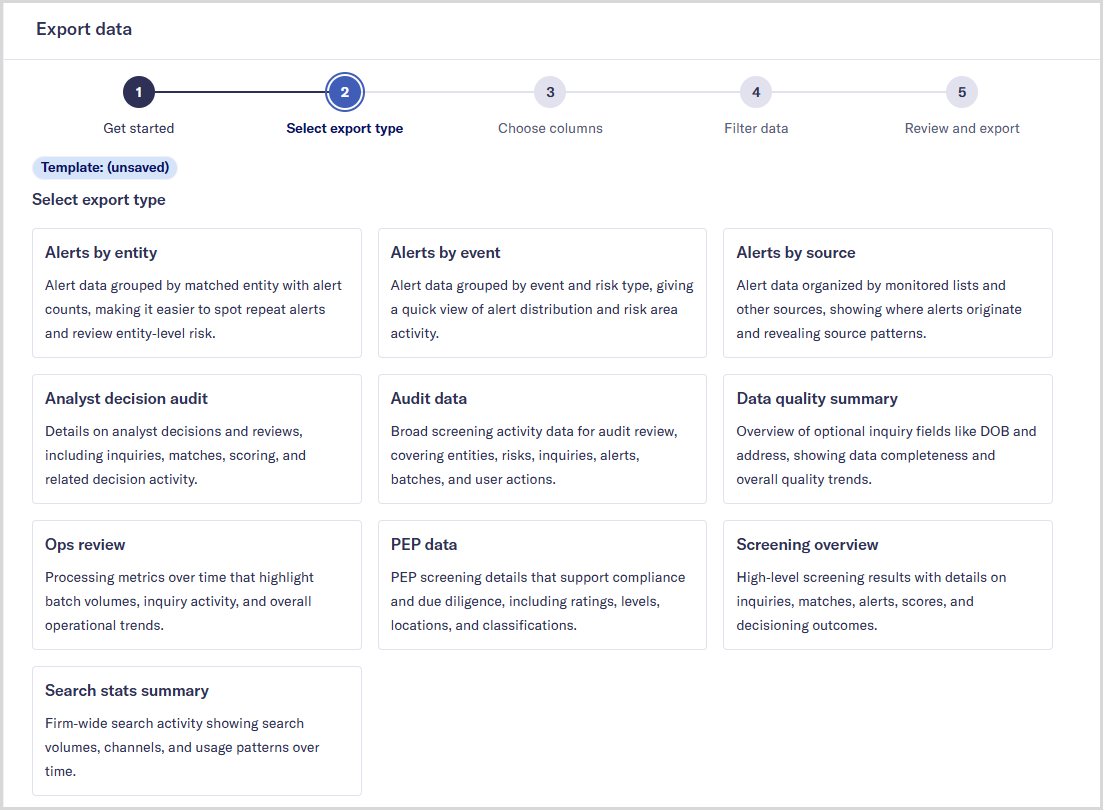
For help choosing an export type, see Data export types in Grid Reporting.
Select .
Review the columns included in your export.
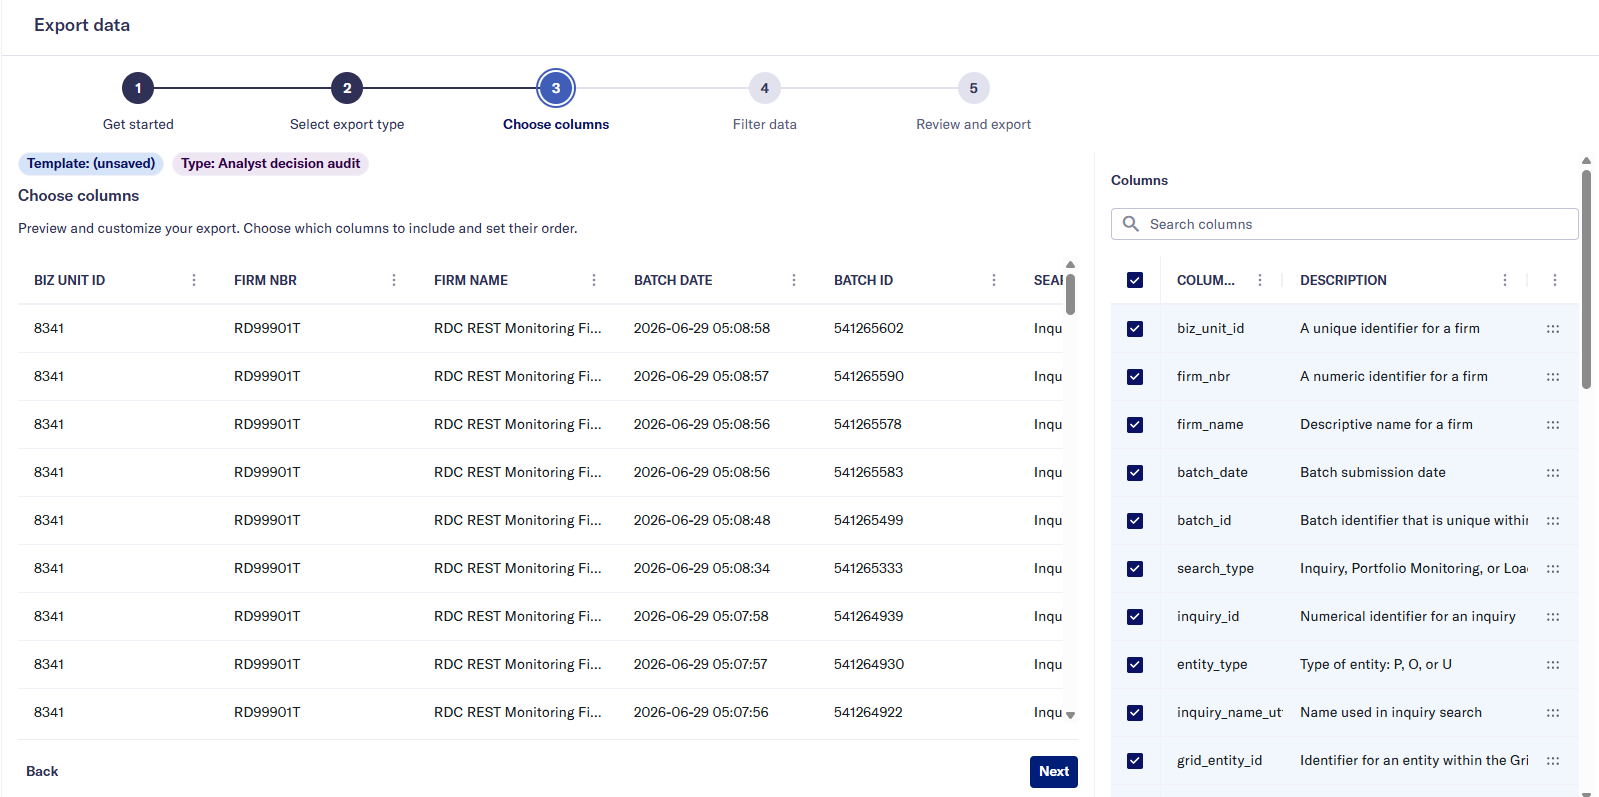
To use the default columns, select .
To customize the columns, select .
Select the checkbox next to each column you want to include.
Use the search box to find a column by name or description.
Drag and drop column names to change their order.
Use to include every column.
Select to remove all selected columns.
When you are finished working with columns, select .
Review and apply filters to define which data is included in your export.
Note
A date filter, for example batch_date or completed_date, is automatically applied. You can change the date range, but you cannot remove this filter.
To use the default date range and apply no other filters in your export, select .
To filter data in your export, select and apply your criteria.
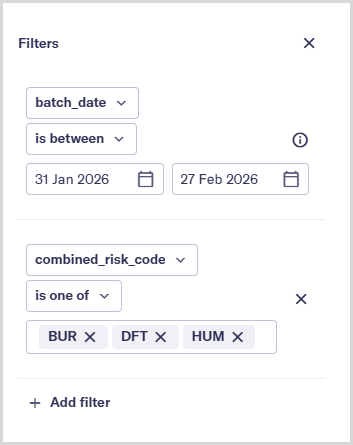
Select to choose a column to filter.
Define an operator and a value for each filter.
To filter for one or more values in the same column, enter one value at a time and press the key after each value.
Multiple filter values in the same column use OR logic.
Select the x for a filter to remove it.
When you are satisfied with your filter settings, select .
Confirm the details for your export.
If everything looks correct, select .
To make changes, select .
To retrieve your export, select in the navigation menu. From there, you can monitor the export's progress and download a ZIP file containing your CSV data when it is ready.